Note: This only applies to the email panel provided by our High Performance Plans.
SPF #
If you’re using CynderHost’s DNS Nameservers, SPF should be set up by default. For external nameservers, add the follows records to your existing SPF or create a new one if it doesn’t exist:
include:mxlogin.com
 include:ms.cynderhost.com
For example, if your existing SPF TXT record is:
v=spf1 +a +mx +include:o1.sendgrid.net -all
Your new record should be:
v=spf1 +a +mx +include:o1.sendgrid.net include:mxlogin.com include:ms.cynderhost.com -allIf you are creating a new record, add the following as a TXT record:
v=spf1 include:mxlogin.com include:ms.cynderhost.com -allIf an “v=spf1” record already exist for the domain you are setting up, do not add a new record.
DKIM #
To setup DKIM, which is not setup by default even if you’re using CynderHost DNS, you will first want to locate your DKIM key.
You need to repeat this process for every domain, as each domain has it’s own DKIM key.
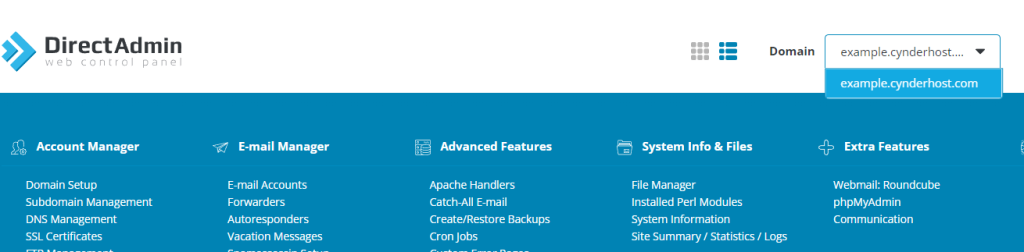
Once logged in to the email control panel, select the domain that you are currently working with from the drop-down box in the top-right corner.
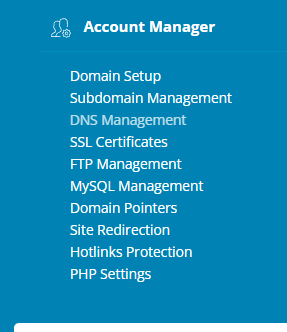
Once the domain is selected, click on Account Manager and then DNS Management, on the top menu.
Then, on the right side, you will see several DNS records. The only DNS record you will use from this page is the DKIM key. Scroll to the bottom and find a record that looks like this:

The right side of that has a bunch of text that, and the name should be “x._domainkey.” That is what you need to copy to your clipboard, to paste later. Specifically, this whole section:

You want need/want to delete the quotations surrounding the recording, depending on your DNS provider. If you’re using CynderHost for DNS, it does not matter.
Once you have copied the text, open up your DNS control panel. If you’re using CynderHost’s Nameservers, see: https://know.cynderhost.com/about/how-to-edit-dns-records-in-plesk/
Then, create/add a new TXT record with the name: x._domainkey
And a value of whatever string you just copied.
It should look something like this:
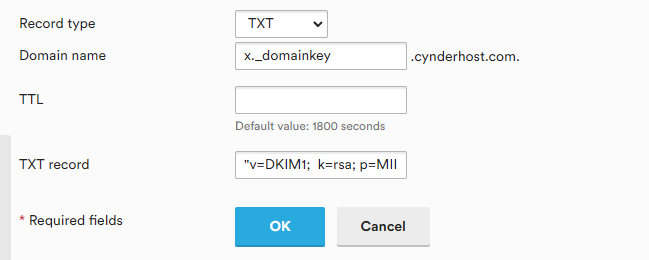
Once you save your edits and DNS propagates, DKIM should be working.
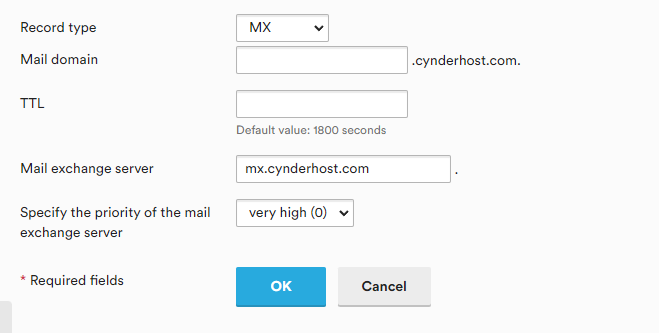
MX #
To setup MX records, which are required for receiving email and is not setup by default even if you’re using CynderHost DNS, you will want to add an MX record that points to mx.cynderhost.com.
Any Priority can be used.