Plesk #
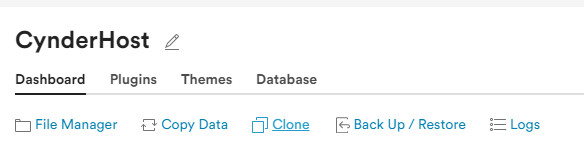
To set up a staging site from your live site, click on the WordPress tab in the left sidebar, and locate the site you want to stage.
Click the “Clone” option:
From here, you will be prompted to create a staging domain or use a current one:

Once you click start, your site will be cloned to the staging domain and you can make the necessary changes/tests.
When you are ready to push your changes live, click the “Copy Data” option on the staging domain:

From here, select the “Target” domain as the live site:
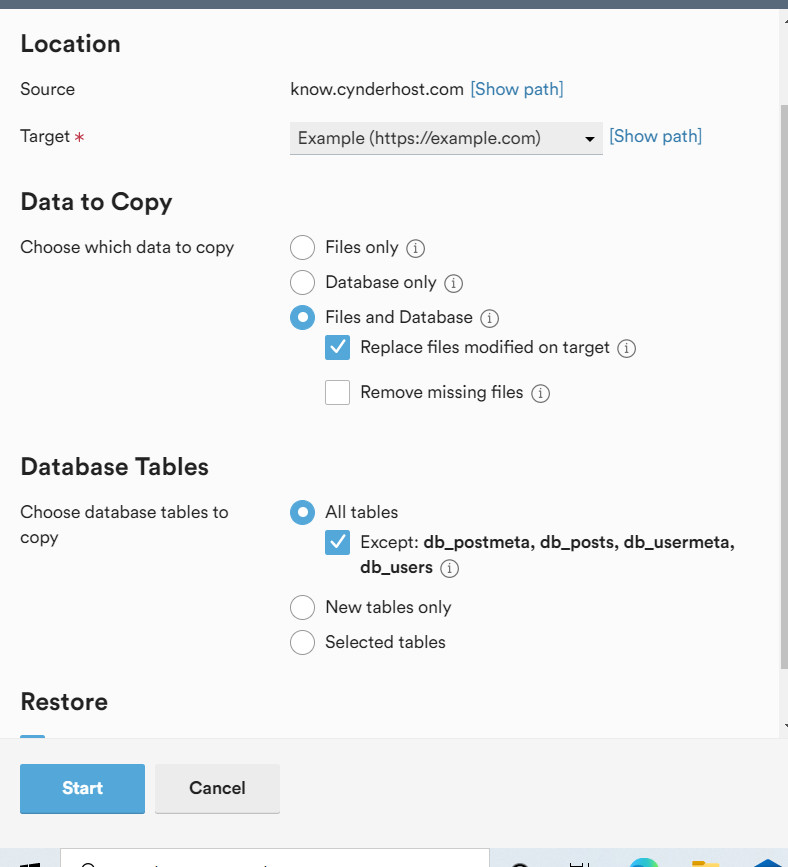
You’ll have the option to configure how you want to merge the sites – you can merge either the entire site, just the database, just the files, or some parts of the database and files.
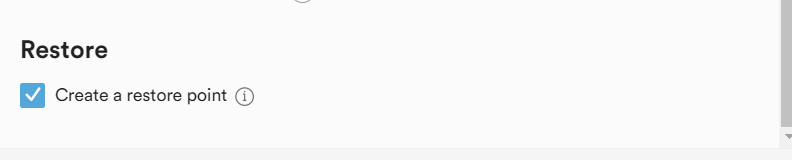
We highly recommend keeping “Create a restore point” checked so you can rollback if something goes wrong:
Click Start, and your changes will be merged to live automatically.
cPanel #
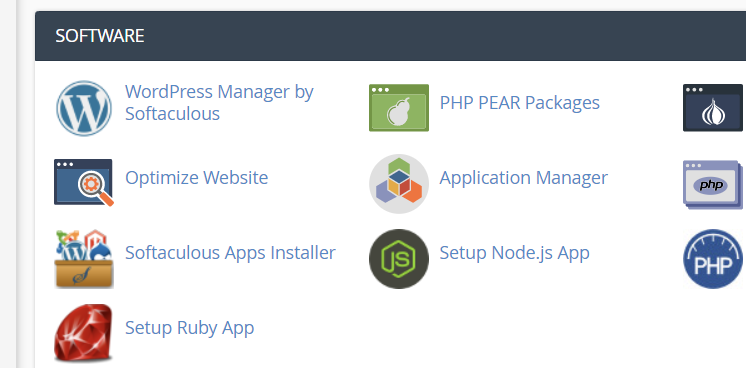
To create a staging site in cPanel, click the “WordPress Manager by Softaculous” link in cPanel:
From here, choose the install you want to set up a staging site for, and click “Staging”:
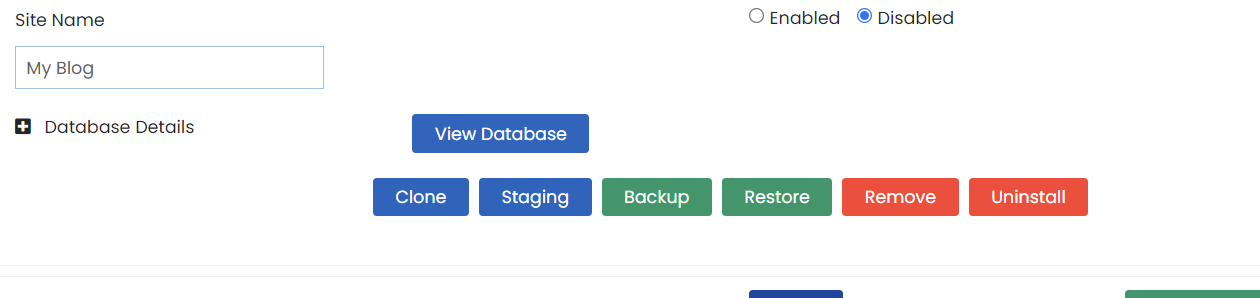
Fill out the next screen with your desired options and make whatever changes/tests you want on the staging site that has been created.
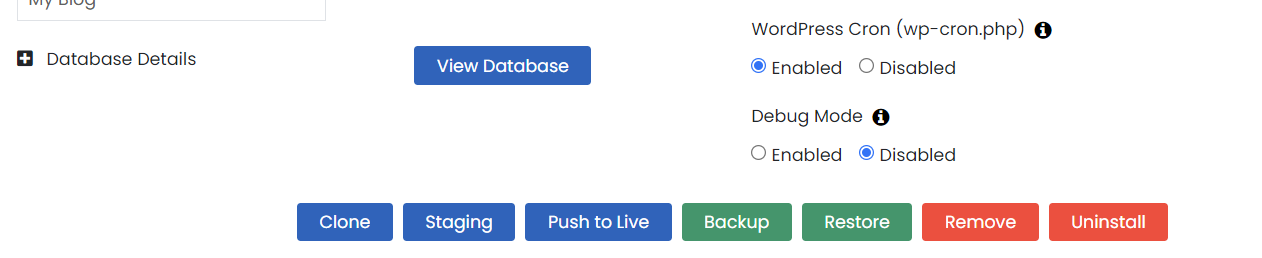
To merge your changes to live, locate the changes and choose “Push to Live”:
Under the customize tab, you have the ability to select what changes you want to be merged:
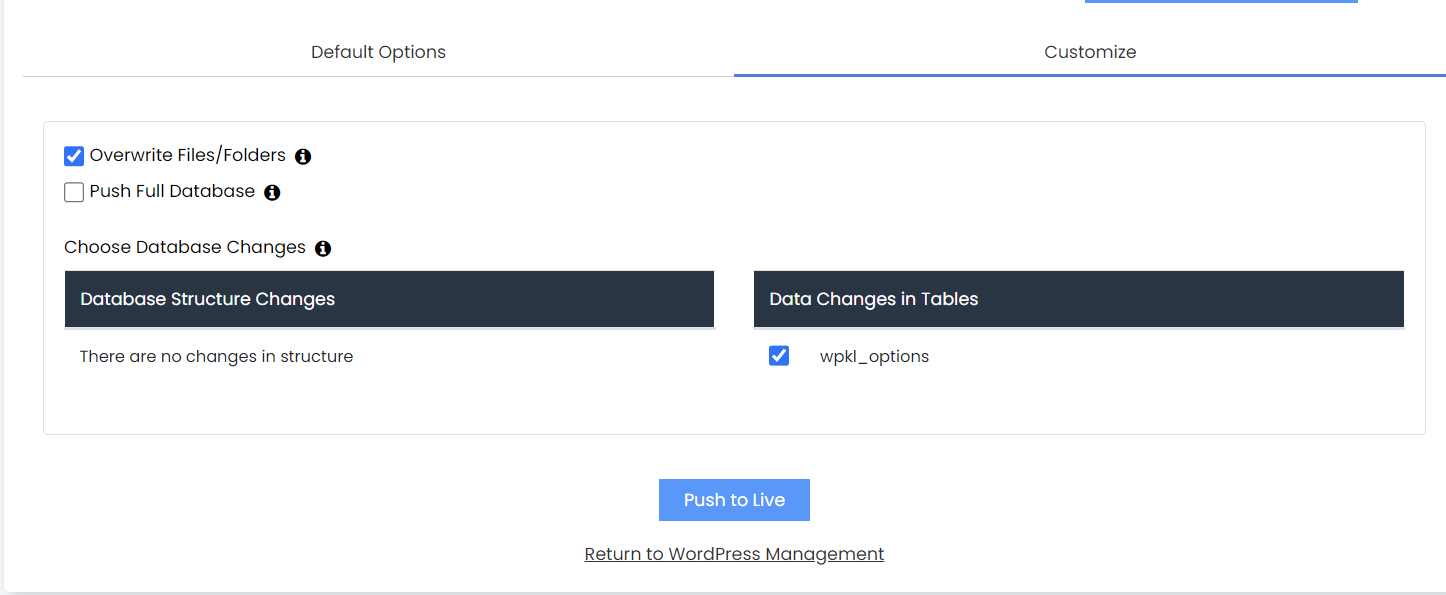
Once everything is set, hit the Push to Live button and your selected changes will be pushed to your live site.
This does not create a backup of your live site beforehand – we highly recommend do this manually before you push your site to live.


