Skip to the content
CynderHost
  • Status
  • Main Site
  • Client Portal
  • Contact Support
  • Status
  • Main Site
  • Client Portal
  • Contact Support

cPanel

39
  • Getting Started
  • Setting Up And Redirecting To https (SSL)
  • Installing WordPress, Drupal, or Joomla
  • How To Upload And Add Site Files
  • Backing Up cPanel and Websites
  • “SSL Isn’t Working. My Site Shows Not Secure”
  • How To Migrate Your Website From cPanel
  • Export Or Import A MySQL Database With phpMyAdmin
  • Fix “Resource Limit Reached” Errors
  • PHP Workers
  • Change PHP Version in cPanel
  • Enabling GZIP Compression
  • HTTPS Version of URL Is Showing the Wrong Site
  • Adding a Subdomain/Other Domain As a Copy Of a Site (cPanel)
  • Enable Brotli Compression
  • Login To cPanel
  • How to Edit DNS Records in cPanel
  • Adding PHP Extensions (cPanel)
  • Increasing PHP/WordPress Max Upload Size
  • Reinstall WordPress
  • Viewing Hidden (dot) Files in the cPanel File Manager
  • Whitelisting Emails Addresses or Domains from Spam Filter
  • Blacklisting Emails Addresses or Domains from Spam Filter
  • 550 Authentication Required
  • Manage Websites via WP Toolkit
  • Remote MySQL Not Working (Server Connection Error)
  • Cloudflare Not Working When SSL is Set to “Full (Strict)”
  • Restoring a Backup in cPanel
  • Accessing PHPMyAdmin
  • Connecting to and Using FTP
  • Creating a Backup in cPanel
  • Setting Up a Staging Site for WordPress (cPanel/Plesk)
  • Resetting cPanel/Plesk Password
  • Moving/Copying a WordPress Site to a Different Domain in the Same Hosting Plan
  • Add a Subdomain in cPanel
  • Editing PHP.ini Configuration Variables
  • Cloudflare, WordPress, and Redirect Loops
  • Unblocking your IP Address on cPanel
  • Connecting a Cloudflare-Registered Domain

Domain

11
  • Nameservers
  • Adding and Setting Up Domains
  • How To Setup Cloudflare As A CDN
  • How Long Does DNS Propagation Take? Can You Make It Faster?
  • Migrating Your Domain/Website With Zero Downtime
  • Clearing Your DNS Cache (Browsers)
  • Clearing Your DNS Cache (OSes)
  • Previewing Your Website
  • Add a Subdomain in cPanel
  • Connecting a Cloudflare-Registered Domain
  • Setting Up a Domain on High Performance Plans

Plesk

25
  • How To Install WordPress
  • Backing Up Plesk and Websites
  • Export Or Import A MySQL Database With phpMyAdmin
  • Supported PHP Extensions (Plesk)
  • Enabling GZIP Compression
  • How to Edit DNS Records in Plesk
  • Reinstall WordPress
  • FTP Not Working on High-Performance Plans
  • Disabling Caching
  • Unblock an IP From the Firewall
  • Block a URL (Page Rules)
  • Manage Websites via WP Toolkit
  • AWStats/Webstats and Bandwidth Don’t Match Up
  • Contact Form 7 Submission Does Not Work (Loads Forever)
  • Accessing PHPMyAdmin
  • Connecting to and Using FTP
  • Setting Up a Staging Site for WordPress (cPanel/Plesk)
  • Resetting cPanel/Plesk Password
  • Raising the PHP Upload Limit / Max Post Size
  • Moving/Copying a WordPress Site to a Different Domain in the Same Hosting Plan
  • Setting Up DNS Records for Email
  • Adding a New Domain
  • Managing SSL on High Performance Plans
  • Connecting a Cloudflare-Registered Domain
  • Setting Up a Domain on High Performance Plans

WordPress

28
  • How To Speed Up Your WordPress Website
  • Debugging PHP, WordPress, And .htaccess Errors (5XX)
  • Backing Up A WordPress Website
  • How To Migrate A WordPress Website
  • Building Websites With WordPress And Page Builders
  • Using WordPress Plugins
  • WP 5.5 Update Breaks Site
  • Nulled Themes And Premium Plugins
  • Make WordPress Accessible From Multiple Domains
  • Images Not Showing Up After Migration
  • Mixed Content Warnings in WordPress
  • Increasing PHP/WordPress Max Upload Size
  • Reinstall WordPress
  • 404 Errors on WordPress When Accessing Pages, Posts, and Archives
  • Setting Up the CynderHost WordPress Plugin
  • Manage Websites via WP Toolkit
  • Put WordPress in Maintenance Mode
  • Have WordPress Homepage Display a Static Page
  • Disabling WordPress Plugin Without WP Admin Access
  • Locked Out From Website By WordPress Plugin
  • WordPress Security 101: Keeping Your Site Secure
  • Contact Form 7 Submission Does Not Work (Loads Forever)
  • Restoring a Backup in cPanel
  • Accessing PHPMyAdmin
  • Can’t Access WordPress Admin: “Sorry, you are not allowed to access this page.”
  • Setting Up a Staging Site for WordPress (cPanel/Plesk)
  • Raising the PHP Upload Limit / Max Post Size
  • Moving/Copying a WordPress Site to a Different Domain in the Same Hosting Plan

Web Development

7
  • How To Create A Hello World Website
  • Debugging PHP, WordPress, And .htaccess Errors (5XX)
  • Changing Your Hosts File
  • Clearing Your DNS Cache (Browsers)
  • Clearing Your DNS Cache (OSes)
  • Previewing Your Website
  • Setting Up a Staging Site for WordPress (cPanel/Plesk)

Client & Billing

14
  • Contacting Support
  • Site/Service Has Been Suspended or Terminated
  • Overdue And Recurring Invoices
  • Can’t Verify My Email Address
  • How To Cancel a Subscription
  • Invoice Payment Isn’t Showing Up
  • Can’t Sign In With Google
  • Pay an Invoice
  • Email Verification Isn’t Working
  • Setting Up a Stripe/CC Recurring Payment
  • Setting Up a Recurring PayPal Subscription
  • Resetting cPanel/Plesk Password
  • How to Upgrade or Downgrade a Plan
  • Check Remaining Funds/Balance

NitroPay

6
  • What Is NitroPay?
  • Signing Up For NitroPay
  • NitroPay Payments
  • How To Add Ads To Your Site
  • Setting Up Your Ads.txt
  • Ad Placement Tips for Best Earnings

API

3
  • Cache API Reference
  • Setting Up the CynderHost WordPress Plugin
  • CynderHost High Performance API Key

Emails

12
  • How to Adjust Spam Filters?
  • Incoming Emails Going to Spam?
  • Whitelisting Emails Addresses or Domains from Spam Filter
  • Blacklisting Emails Addresses or Domains from Spam Filter
  • 550 Authentication Required
  • Microsoft Office 365 / Hotmail / Gmail Delivering My Emails to Spam
  • Email Rejected By Gateway
  • Setting Up DNS Records for Email
  • Adding a New Domain
  • Logging into the Email Panel
  • Creating an Email Account
  • Checking Email via Webmail, and IMAP/POP3
View Categories

How To Add Ads To Your Site

2 min read

0:00 / 1:56
  • View as Markdown Open this page as plain Markdown (opens in a new tab)
  • Open in ChatGPT Ask questions about this page (opens in a new tab)
  • Open in Claude Ask questions about this page (opens in a new tab)
  • Open in Google AI Studio Ask questions about this page (Google account required) (opens in a new tab)

To set up ads on your site, please get your placement code first. Login to the NitroPay panel at panel.nitropay.com. Then visit https://panel.nitropay.com/ads/placement-builder.

Select the site you want to add ads for. Enter any ID for the placement ID field that you have not used before.

Choose the format you want.
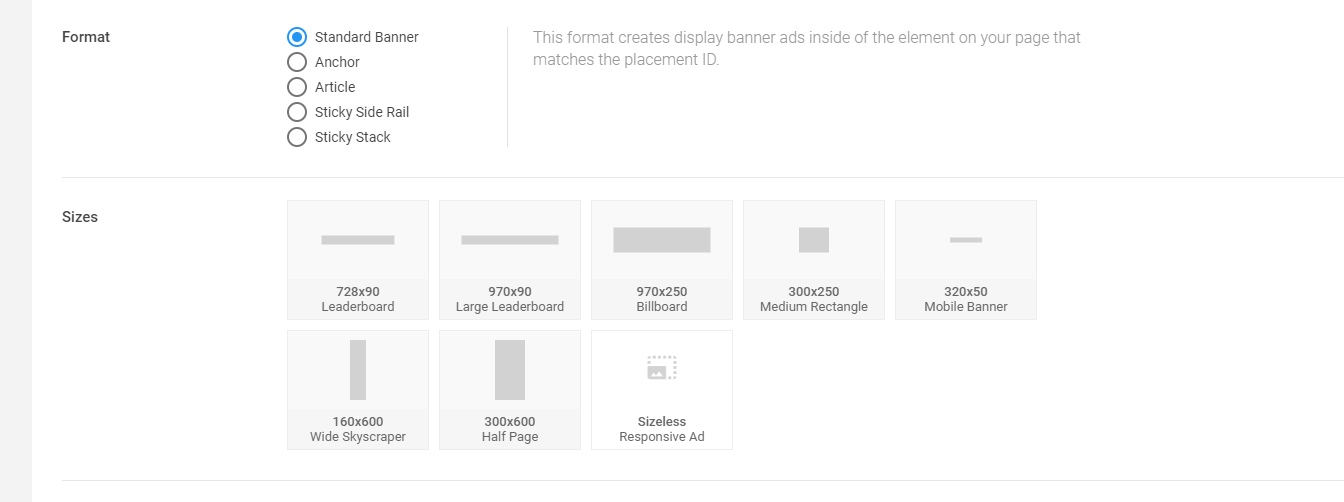
Please see the following demos for the different special kinds of ads.

Anchor, Article, Sticky Side Rail, Sticky Stack

For basic, non-sticky ad units, just choose the “Standard Banner.”

Once you’ve chosen your ad size, configure the other optional settings, including ad refresh time, device filtering, and lazy loading for ads.

We recommend turning on the “Reporting” feature to allow users to report ads they might not like, though NitroPay has extremely stringent processes for vetting advertisers and only allow safe ads.

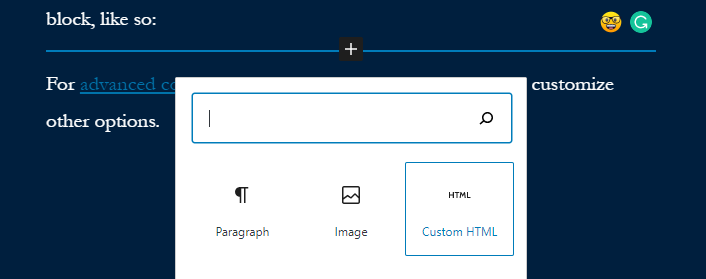
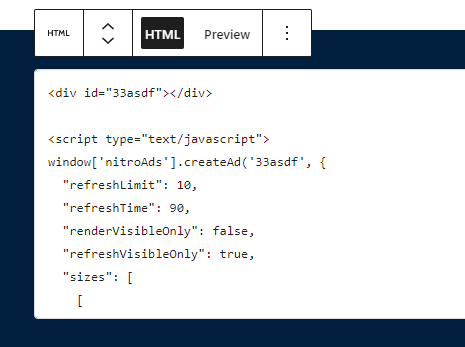
Finally, click the “Get Code” option and copy the code. Paste this into your post directly to integrate ads. For WordPress, use the “Custom HTML” block, like so:
In order for ads to work, you’ll need to add their main script to your header too. Insert the setup code in the <head> section of your theme through a plugin or a child theme. We recommend this plugin.

You can find the setup code under your “Sites” tab, by clicking on the site, going to “Setup Guide” and copying the code there.

Or you can replace the “XXX” in the code below with the ID of your site.

<script type="text/javascript">
window['nitroAds'] = window['nitroAds'] || { createAd: function () { window.nitroAds.queue.push(["createAd", arguments]) }, queue: [] };
</script>
<script async src="https://s.nitropay.com/ads-XXX.js"></script>

After you’ve added this code and the ad unit itself to your page, you should see that ads are starting to show up on your site. If there are any issues, please do not hesitate to contact us and we are happy to resolve them for you.

Happy earning!

For advanced configuration, you can modify the ad code to customize other options.

Updated on November 14, 2021

What are your Feelings

  • Happy
  • Normal
  • Sad

Share This Article :

  • Facebook
  • X
  • LinkedIn
  • Pinterest
NitroPay PaymentsSetting Up Your Ads.txt

© 2026 CynderHost

Powered by WordPress

To the top ↑ Up ↑